Getting Started with Vision
Learn how to upload your first product, describe a scene, and generate your first AI visualization in minutes.
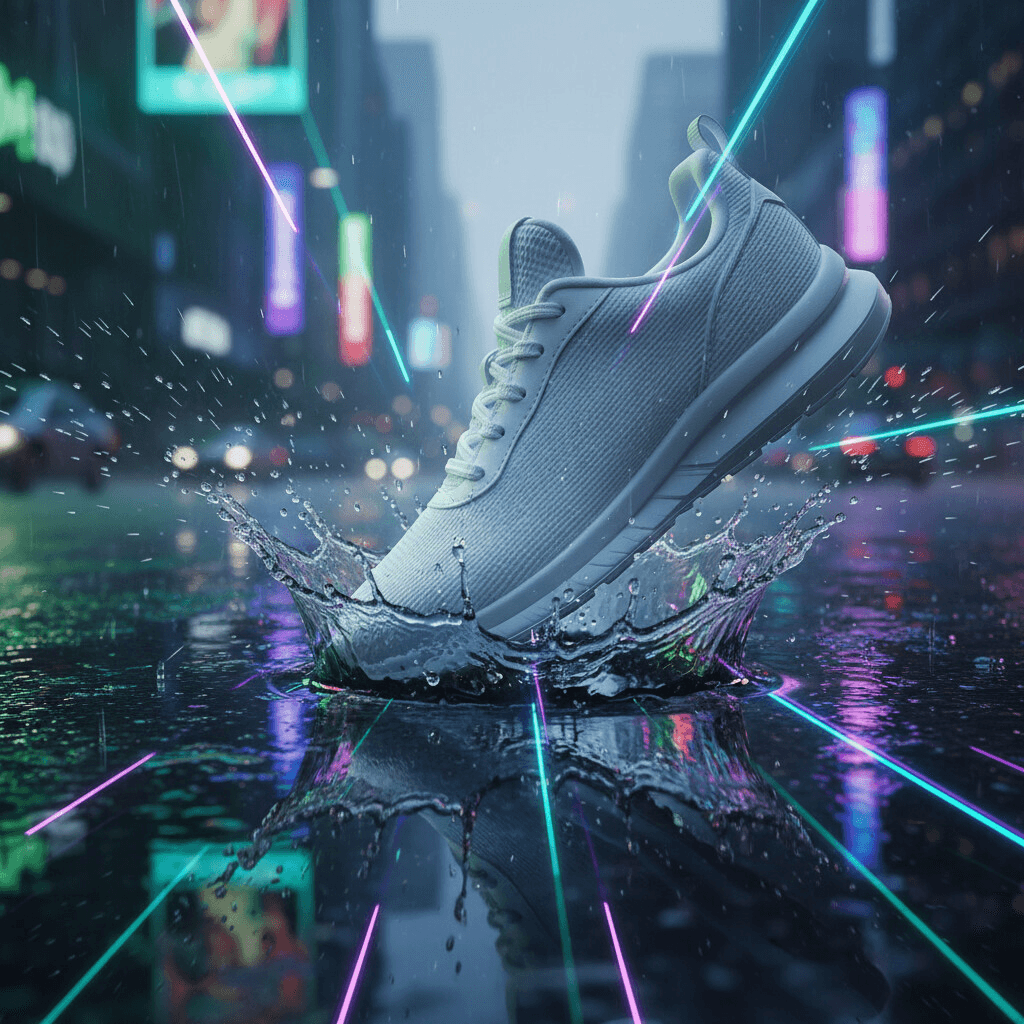
After this guide, you’ll have a basic understanding of how to use Vision to generate your own product visualizations and create images such as this:
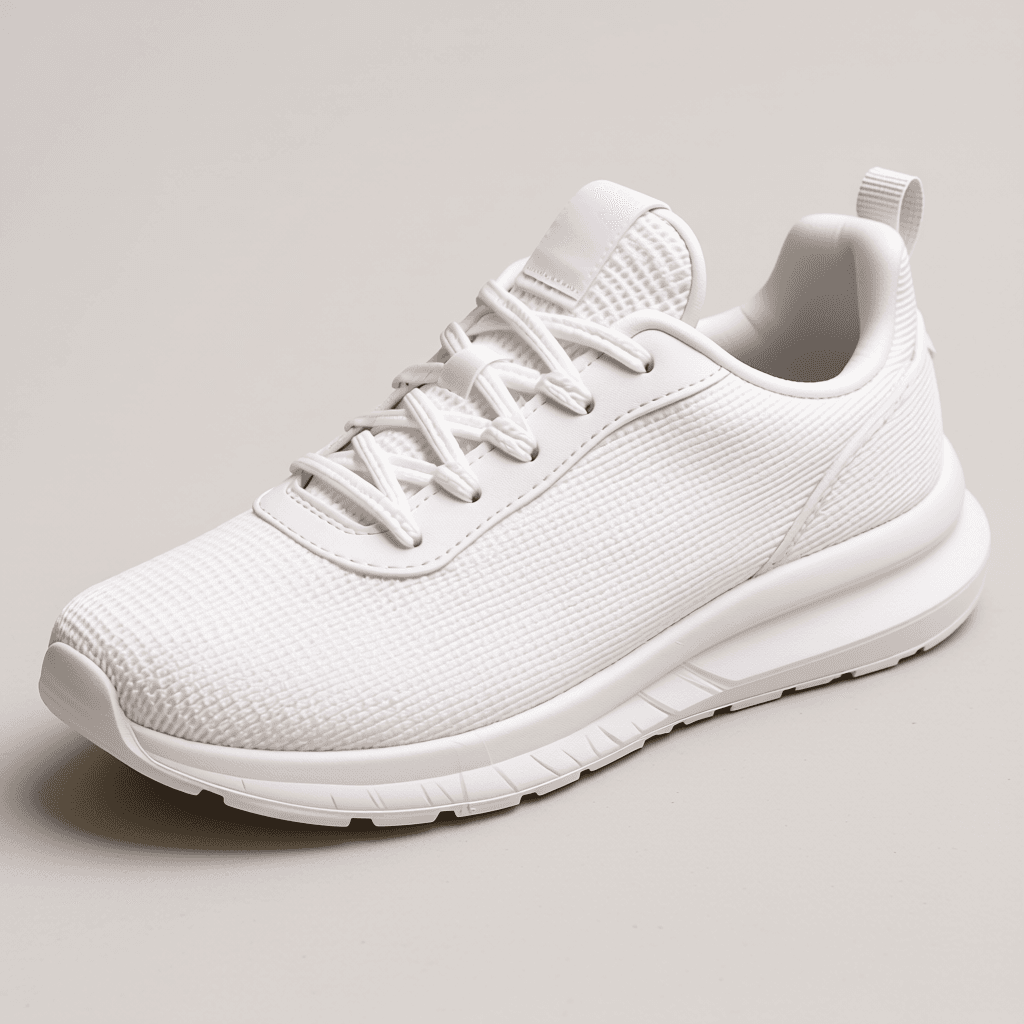
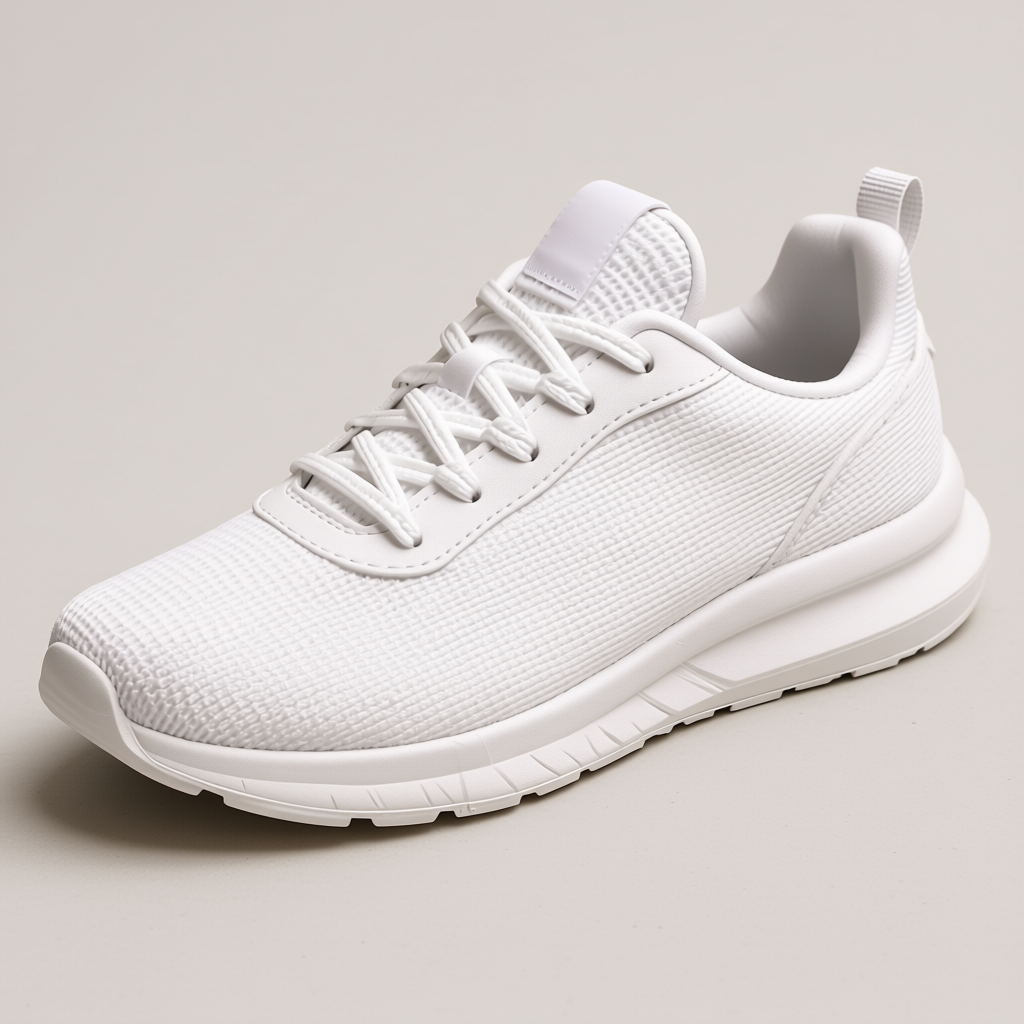
If you don’t have any products yet, you can use this sneaker picture to follow along the guide:
1. Upload your Product
Go to the Vision dashboard and scroll down to the Creation Tools section.
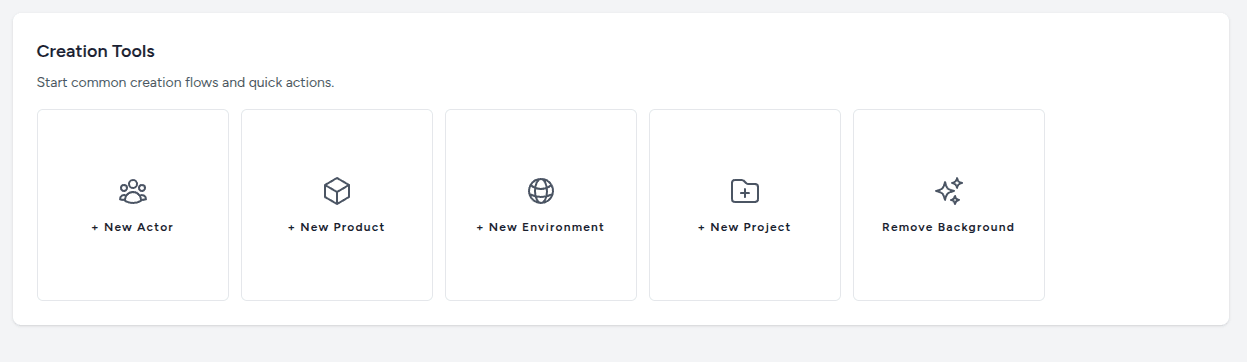
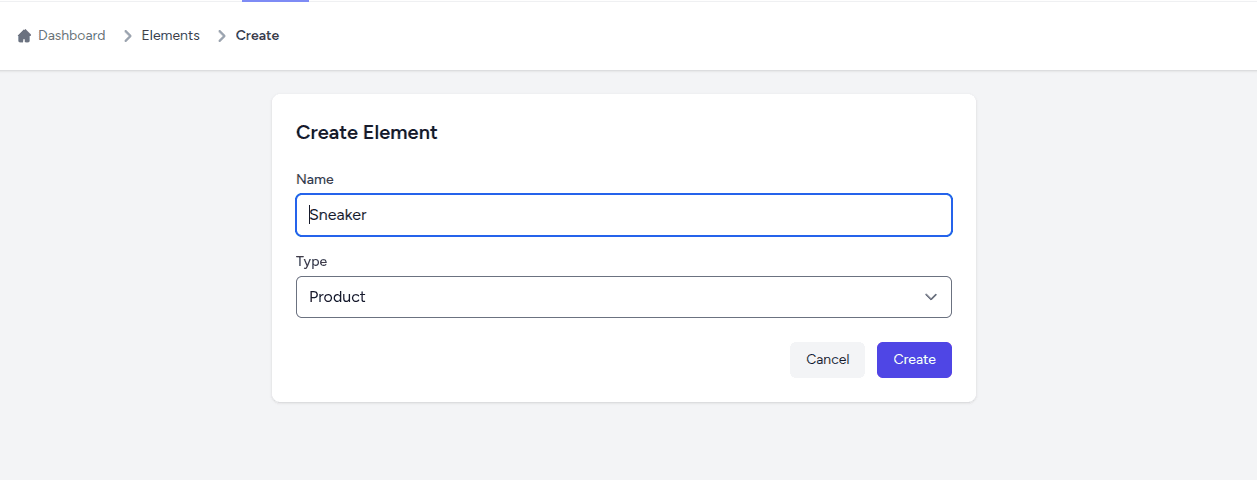
Click on the New Product button to open the product creation form.
You can drag and drop your product image directly into the upload area. For best results, use a high-resolution image (at least 1000px) with good lighting.
Tip: You don’t need to remove the background beforehand. Vision’s AI will automatically handle background removal for you.
Give your product a name and click on Create.
Now you have two options:
- select an existing asset
- upload a new product image

Tip: When you upload a new image directly to the product creation form, Vision will automatically assign it to that product.
Assign an image to your product by clicking on the image you’ve found in the Asset Library or by uploading a new one.
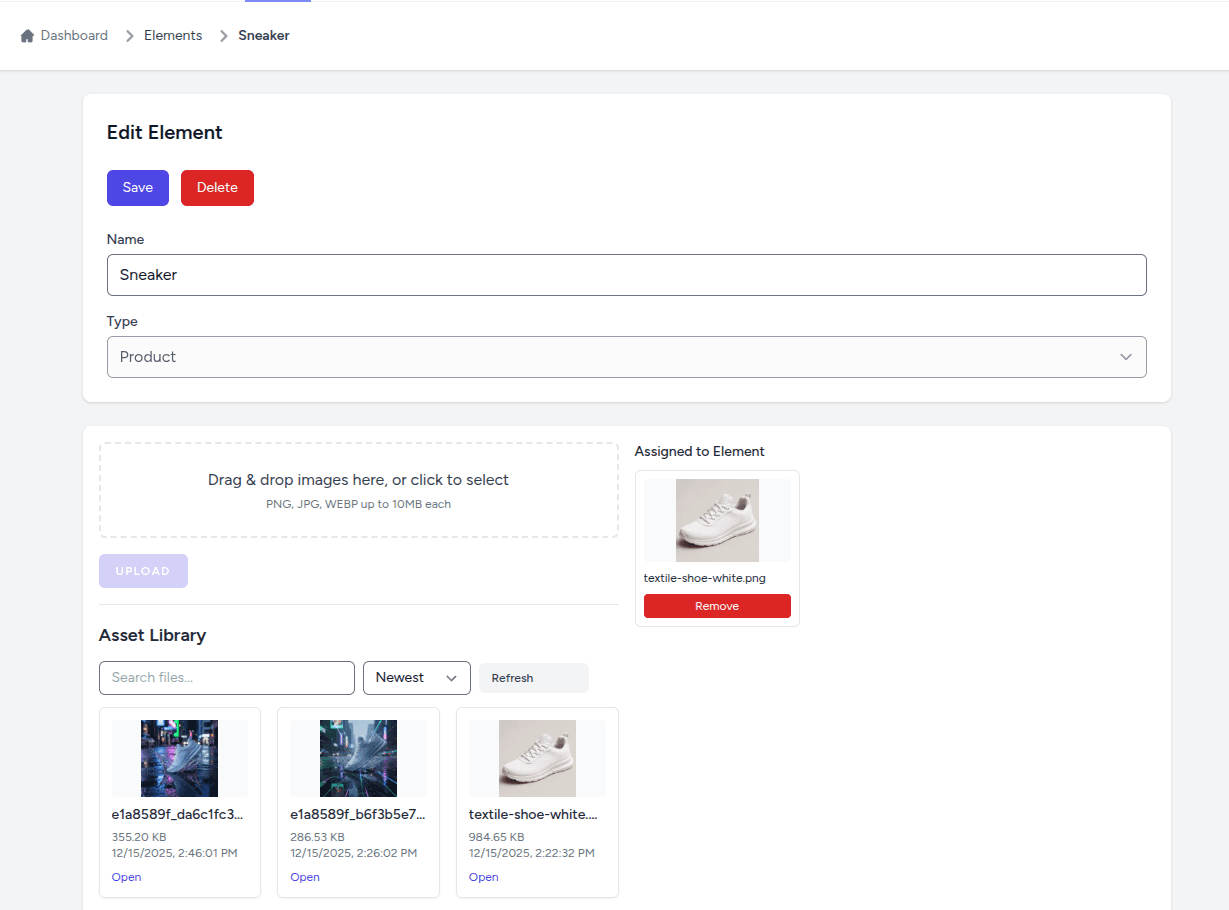
Click Save to store your changes.
Tip: Current version of Vision supports only one image per product, but we’re working on adding support for multiple images.
2. Create a new Project
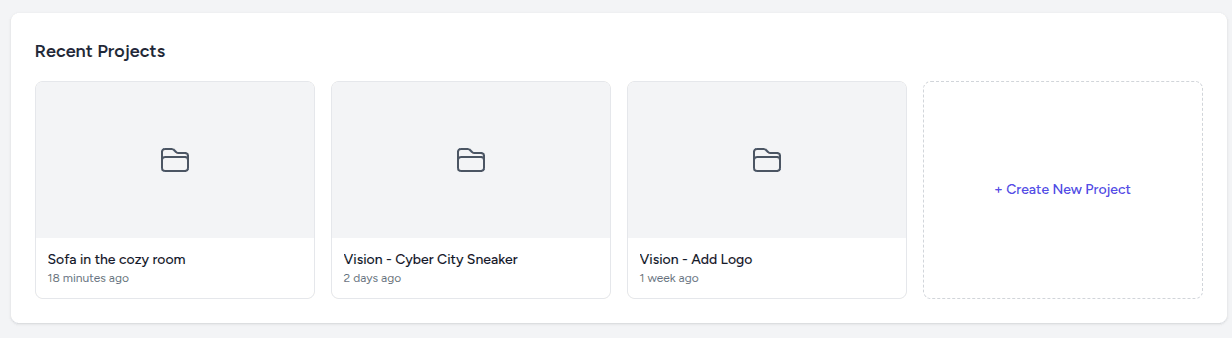
Once your product is uploaded, head to the Projects menu.
You can also access it from the dashboard quick actions section by clicking on the Create New Project button:
Give your project a name and click on Create:

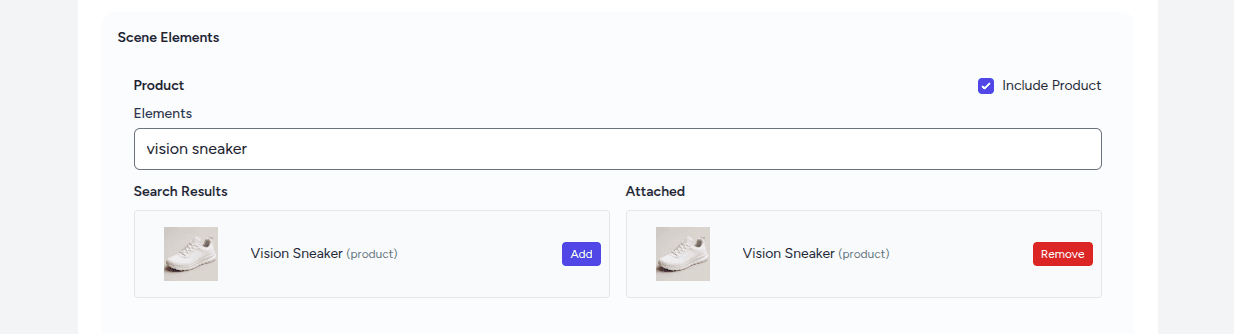
Scroll down to the Scene Elements section and tick the checkbox Include Products.
Search for your product (Sneaker) and click on Add to assign it to the project:
Describe the edits you wish to apply to your product in the Prompt text area:
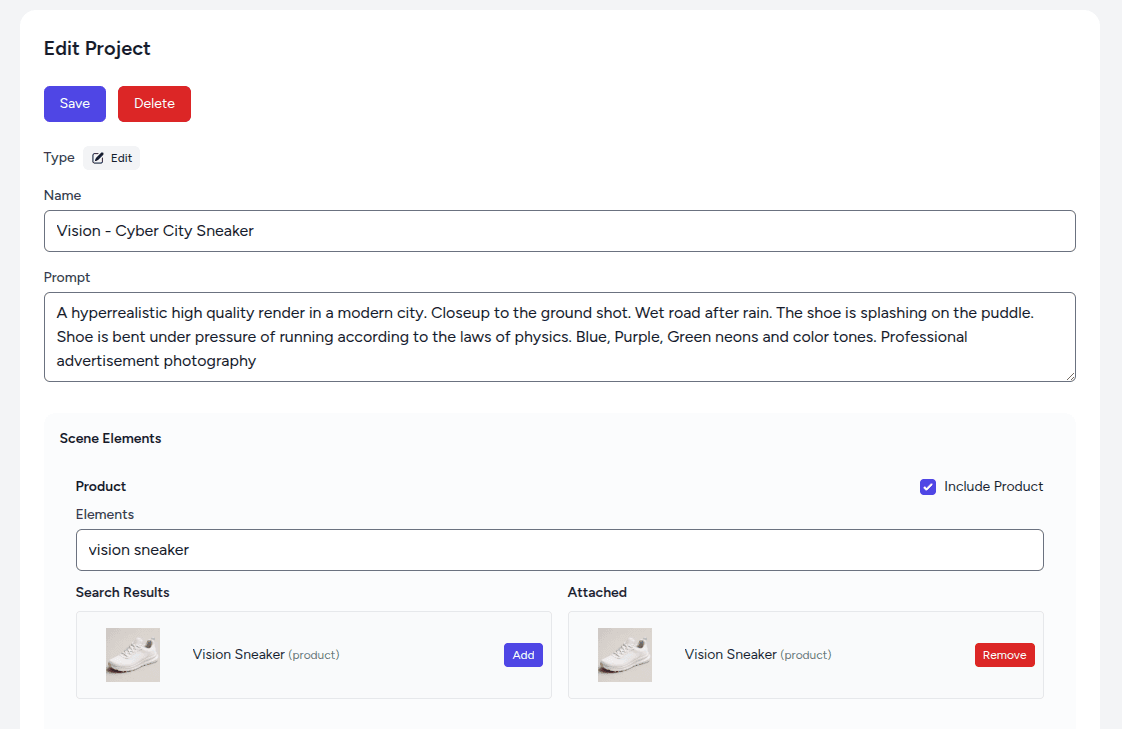
For example:
A hyperrealistic high quality render in a modern city. Closeup to the ground shot. Wet road after rain. The shoe is splashing on the puddle. Shoe is bent under pressure of running according to the laws of physics. Blue, Purple, Green neons and color tones. Professional advertisement photography.
The more precise your prompt is, the closer to your idea the generated images will be.
3. Generate and Refine
Scroll down and click the “Run Edits” button. In about 1-2 minutes, you’ll see the generated product in the selected scene. The Workflow Jobs section shows the last few running and completed tasks.
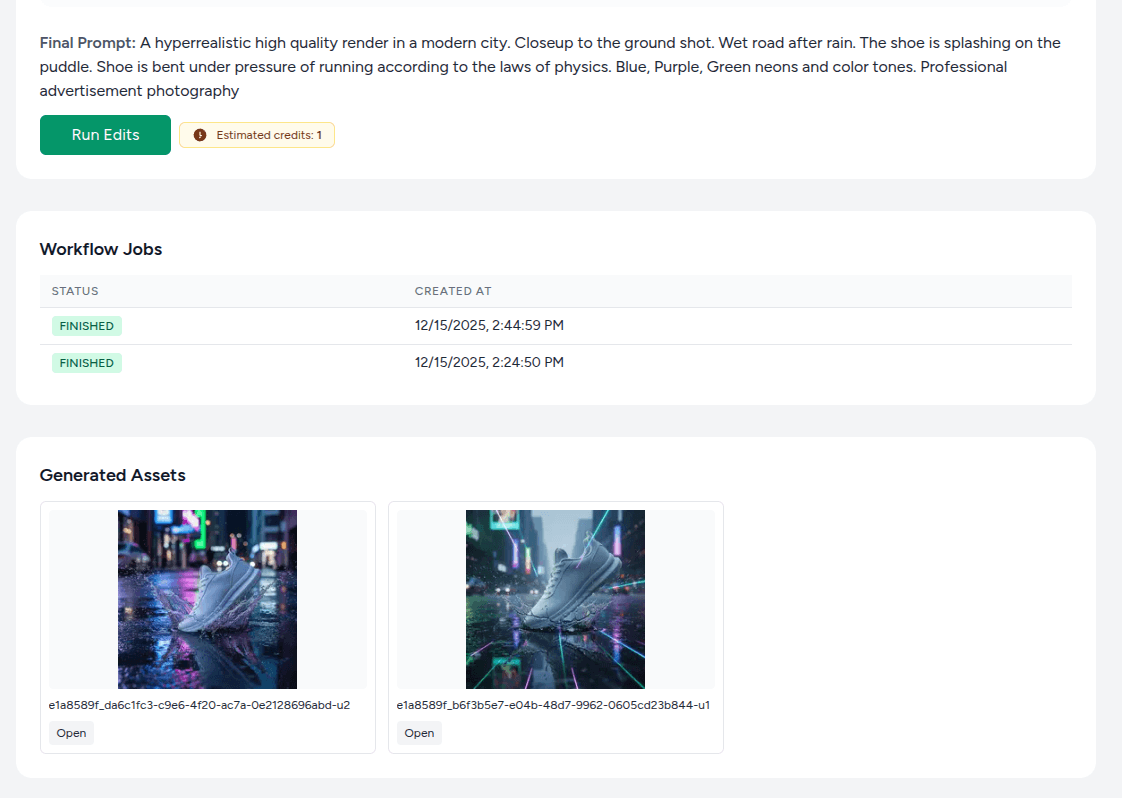
Next to the Run Edits button, you can see the Estimated credits usage for the single generation.
Click on the Open button on the image to see it in full resolution.
Repeat the steps above to generate more images or refine your prompt.