How to Add a Simple Product in Vision
Learn how to add a basic product in Vision using the standard product creation flow.
After this guide, you’ll know how to create a simple product, upload its images, save it correctly, and manage it later in your product library.
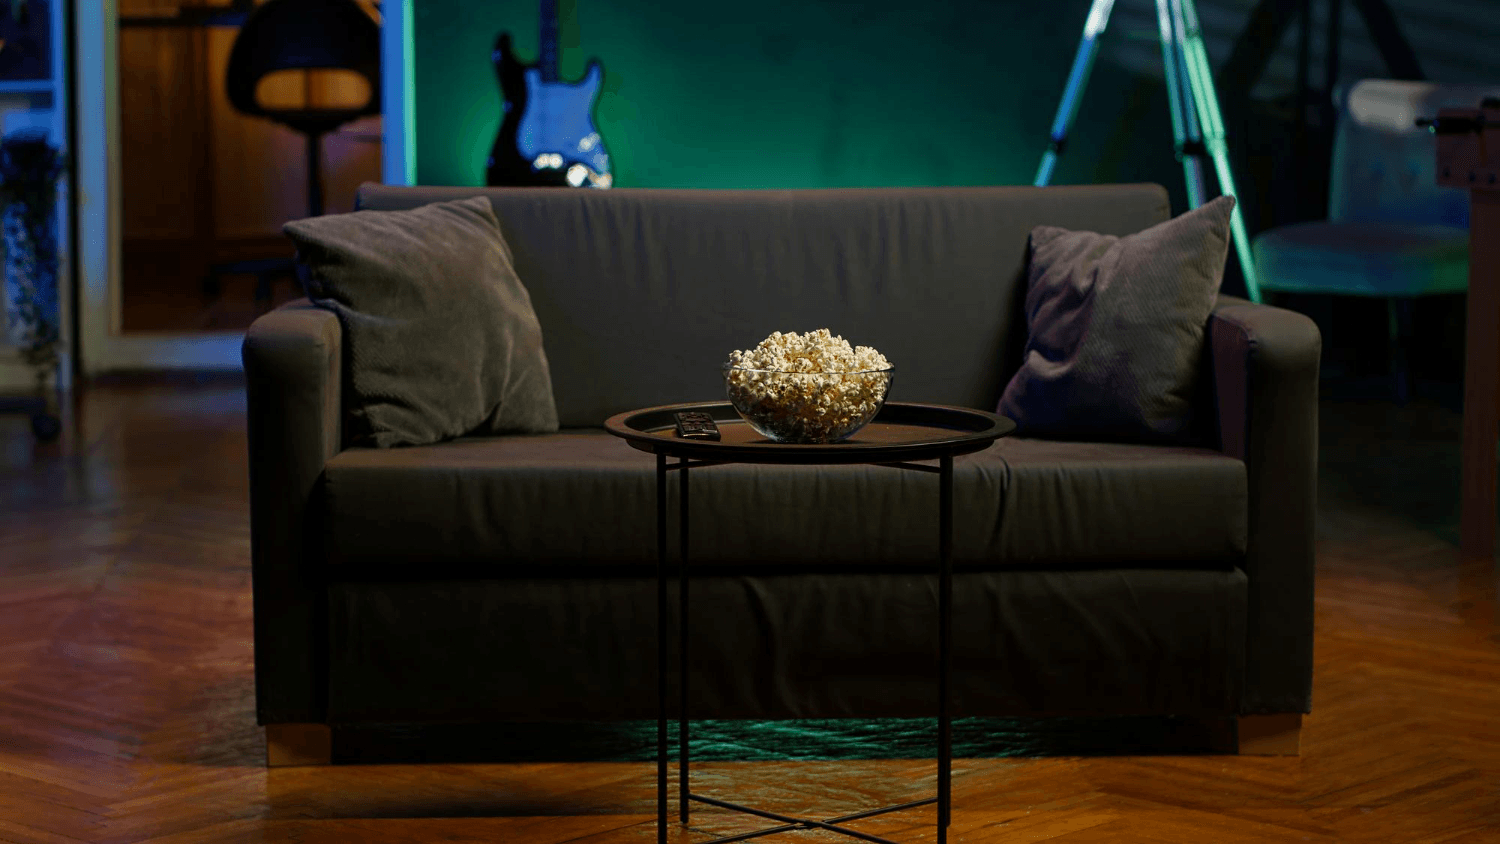
This workflow works best for everyday products like furniture, electronics, or other non-fashion items.
Before you start
Make sure you have:
- access to your Vision account
- a product image ready in PNG, JPG, or WEBP
- files no larger than 10 MB each
Tip: Prepare at least 4 product images from different angles (e.g. front, back, side, top, or bottom).
1. Open the product creation form
Go to the Vision Dashboard and scroll down to the Creation Tools section.
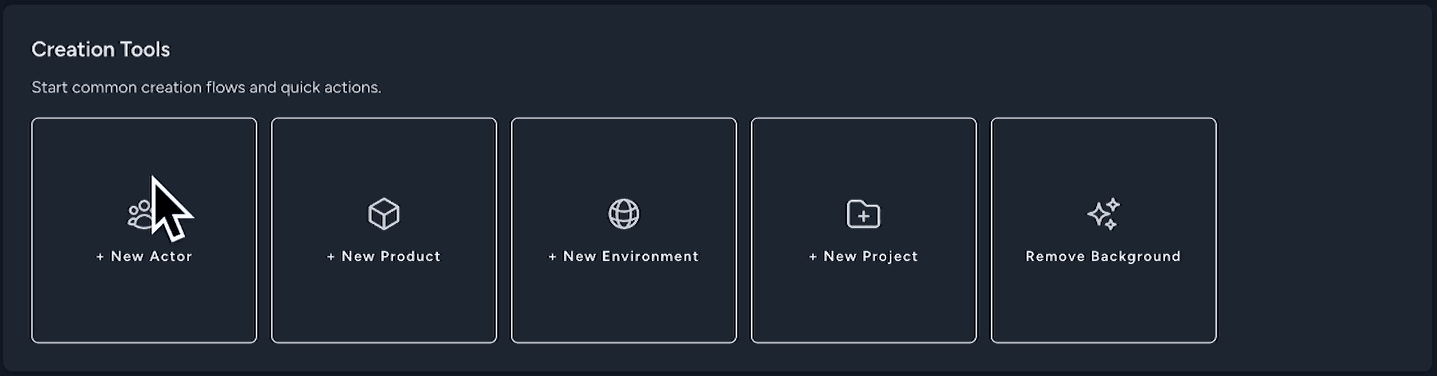
Click + New Product to open the product creation form.

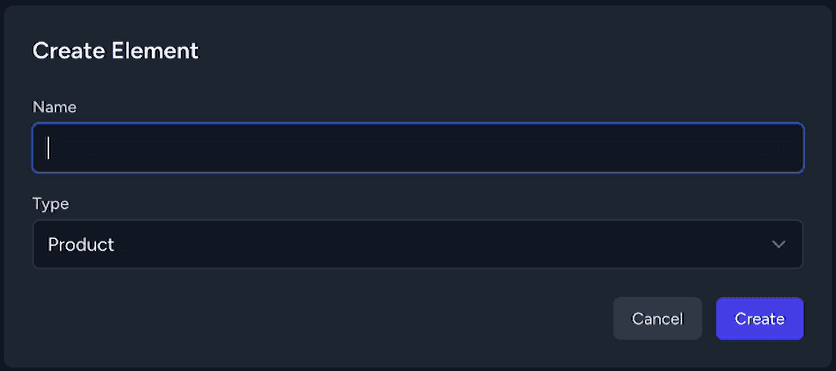
2. Add the basic product details
Enter a name in the Name field.
Tip: Choose a name that will help you identify the product later, especially if you plan to work with many items.
Then, in the Type field, select Product and click on Create.
3. Upload product images
Scroll down to the Photo Inputs section.
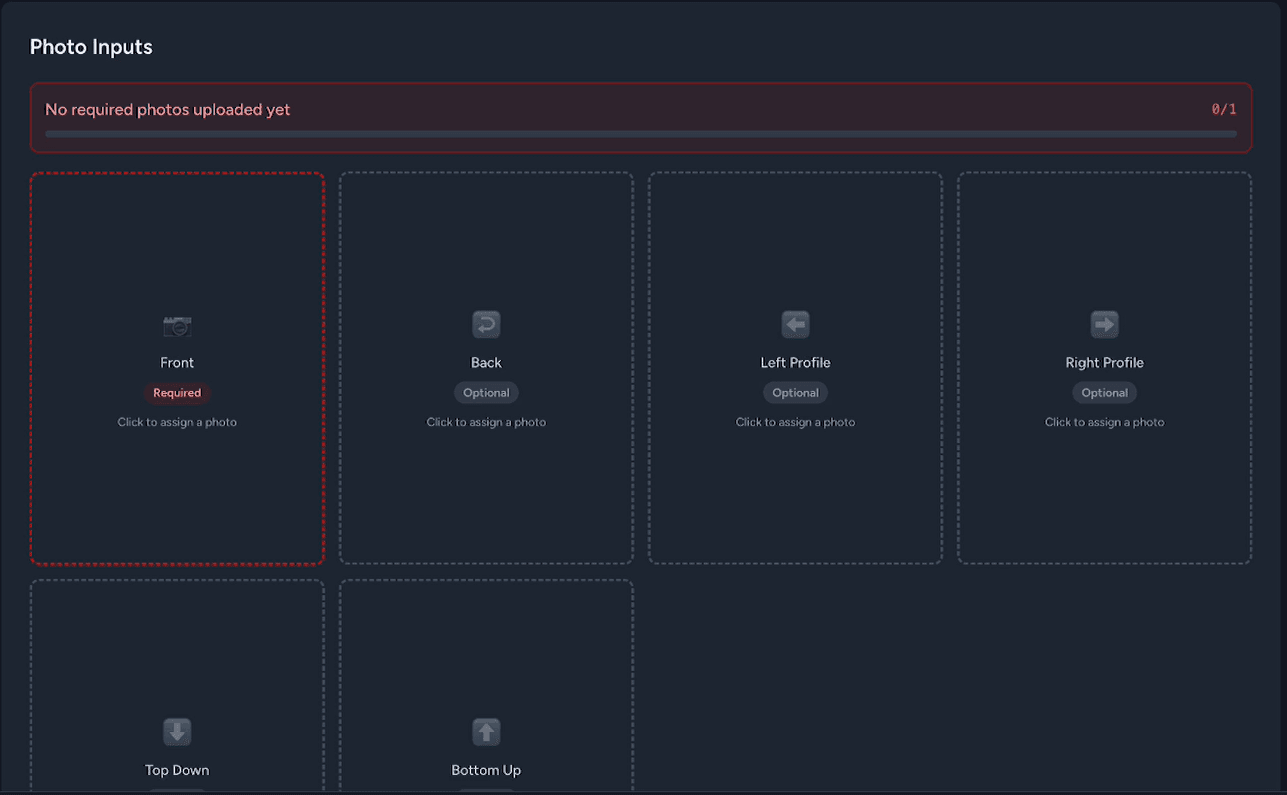
Click the image slot that matches the view you want to upload, such as Front.
You can drag and drop a file into the upload area or click to select it manually.
Supported formats:
- PNG
- JPG
- WEBP
Maximum file size: 10 MB per image
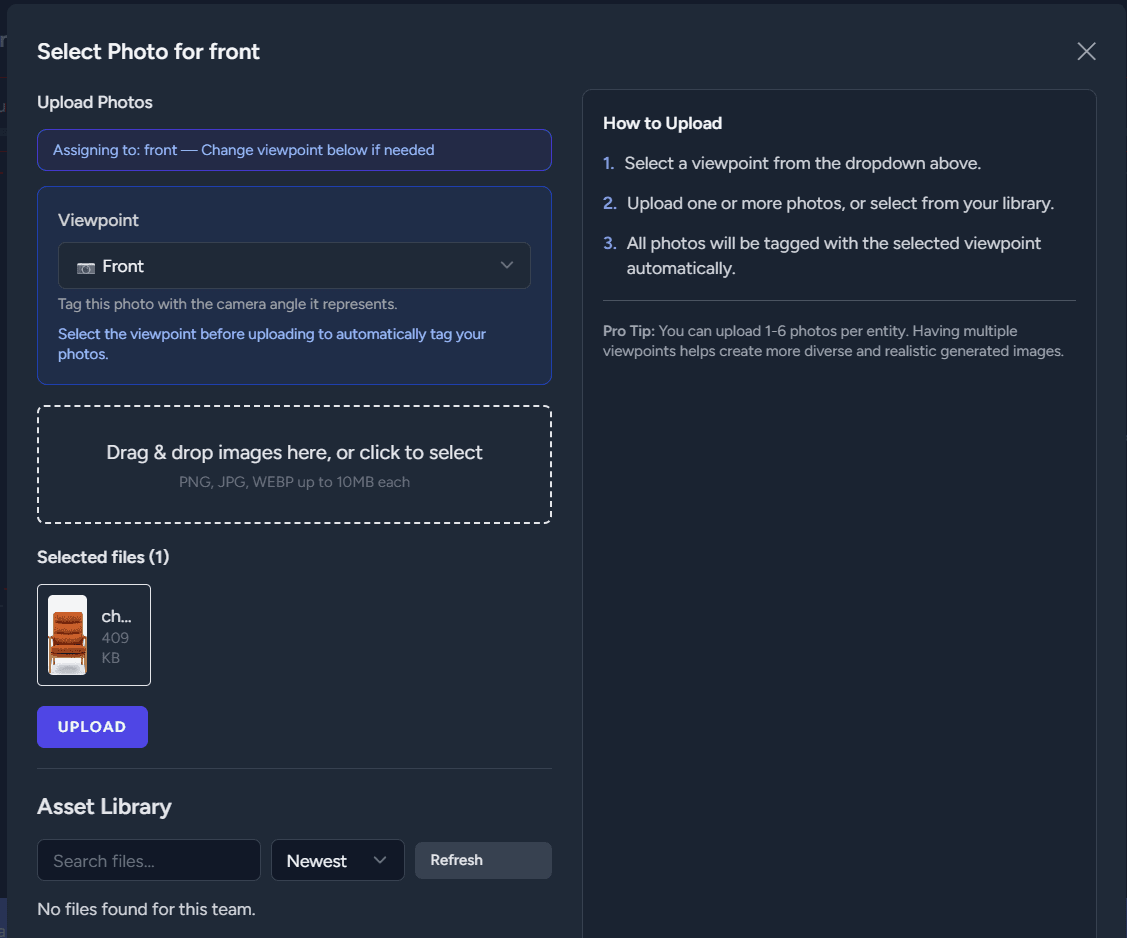
Click Upload to apply the image.
If you have more views of the product, repeat the same process for the remaining image slots.
Ideally, use several angles, such as:
- front
- back
- side
- top
- bottom
4. Check the viewpoint
Each image slot includes a default Viewpoint, which defines the angle of the uploaded image.
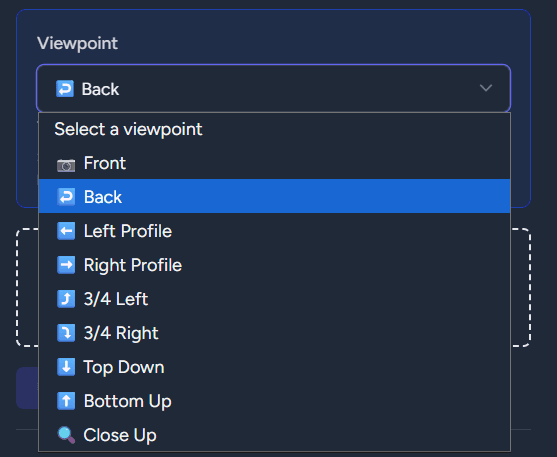
Tip: You can change it if needed, but in most cases it’s best to keep the default value shown on the tile.
5. Review the uploaded images
Hover over the uploaded image to see a zoomed preview and inspect the details more closely.

Tip: If an uploaded image does not appear right away, refresh the page.
Uploaded images are saved automatically after upload.
If you changed the product name, click Save at the bottom of the page to store those changes.
6. Find and manage your product
After saving, go to the Elements section in the navigation menu to find your product.
There, you can browse products, search by name, or filter by type.

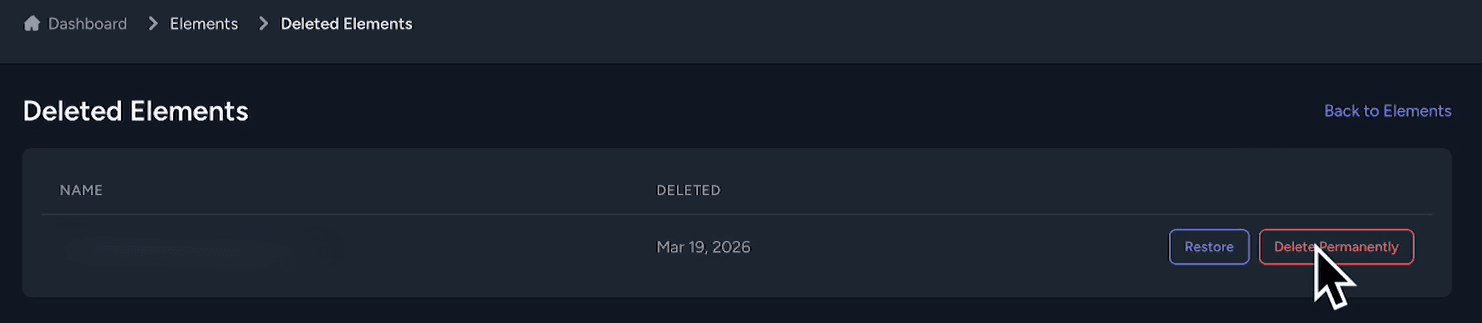
7. Delete or restore a product
If you want to remove a product, open it and scroll down to the Danger Zone section.
Click Delete to move the product to the trash.

Open Deleted Elements to view deleted products.
In Deleted Elements, choose Restore to bring the product back or Delete Permanently to remove it for good.
Once restored, the product will appear again in the main Elements list.
Next steps
You’ve now learned the simplest way to add a product in Vision.
This method works best for generic products like furniture or electronics. If you’re working with clothing or fashion photography, a dedicated fashion workflow is covered in a separate guide.