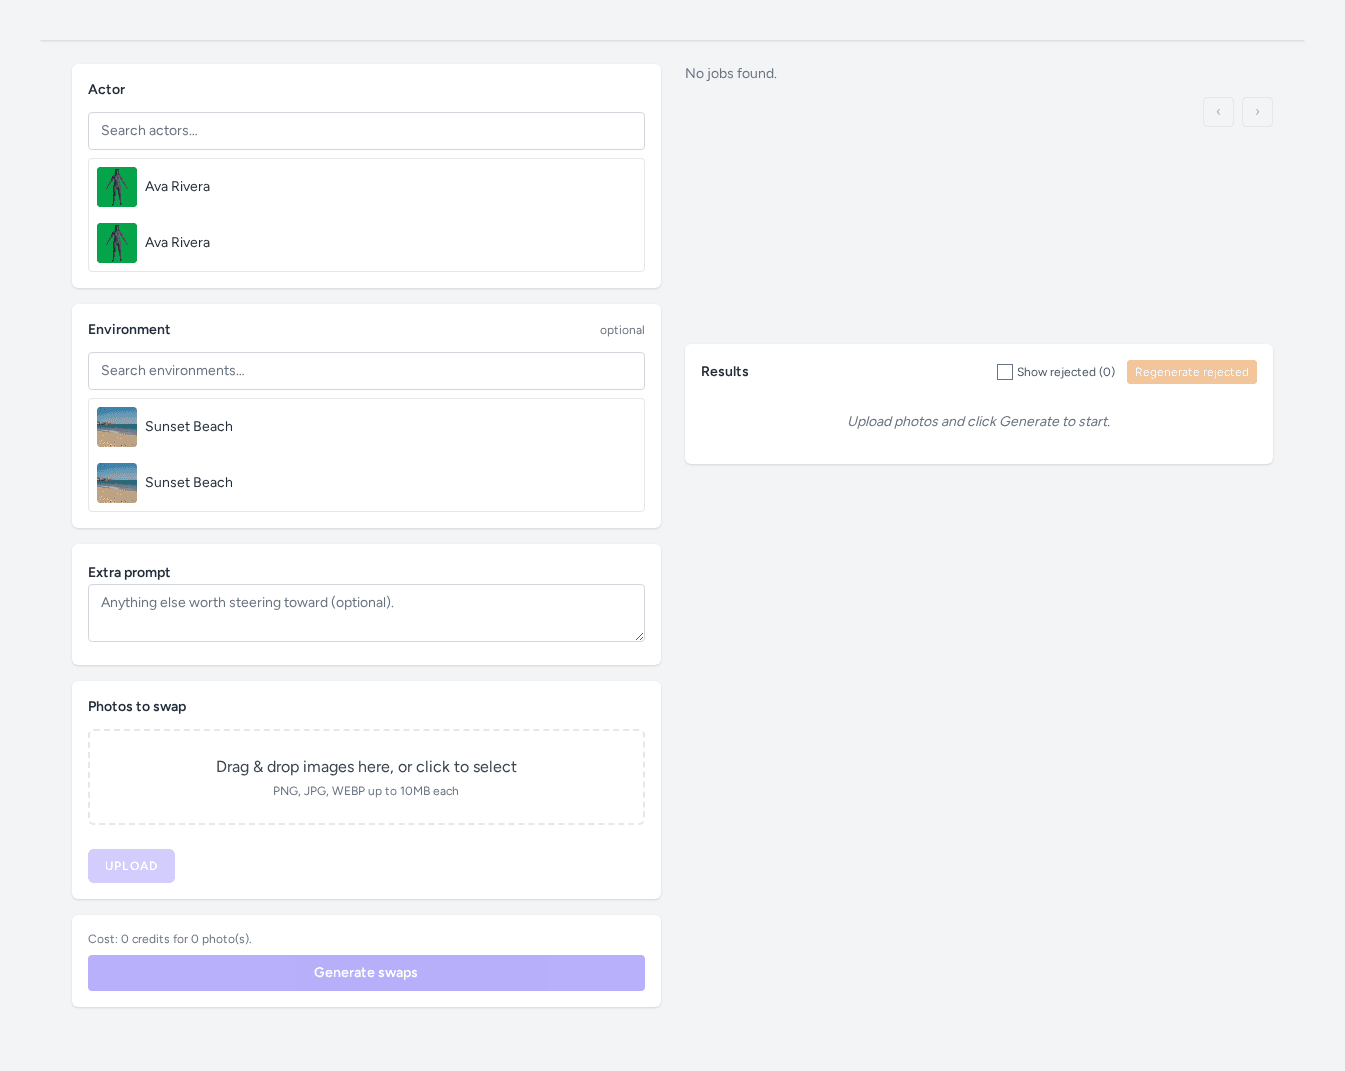
Person Swap lets you place a different model into an existing product photo — no reshooting, no manual compositing. Vision’s AI handles the replacement and blends the result into the background you choose. After this guide, you’ll know how to select an actor, pick an environment, upload your source image, and generate a swapped output ready for your campaign.
This workflow is a great fit when you want to show the same product on a different model or in a different setting without scheduling a new shoot.
Before you start
- You have a Vision account and belong to a team. If you haven’t set one up yet, see the Team Onboarding guide.
- You have an Edit project to work inside. You can create one from the Vision Dashboard.
- Your source image (the photo whose model you want to replace) is saved locally and ready to upload. Vision accepts
.webp,.jpg, and.pngfiles. - Your team has enough credits to run a generation. Check your balance on the dashboard, or see Credit Topup if you need to add more.
1. Open the Person Swap editor
From the Vision Dashboard, open your Edit project. Inside the project editor, navigate to the Person Swap section.
You’ll land on the Person Swap editor — an empty workspace with an actor picker, an environment picker, a prompt field, and an inputs area. The Generate button is disabled until all required fields are filled in.
Tip: If you don’t see the Person Swap section in your project editor, make sure you’re inside an Edit project. Person Swap is not available in other project types.
2. Choose an actor
In the Actor picker, type the name of the model you want to use in the search box. Vision searches your team’s saved actors as you type.
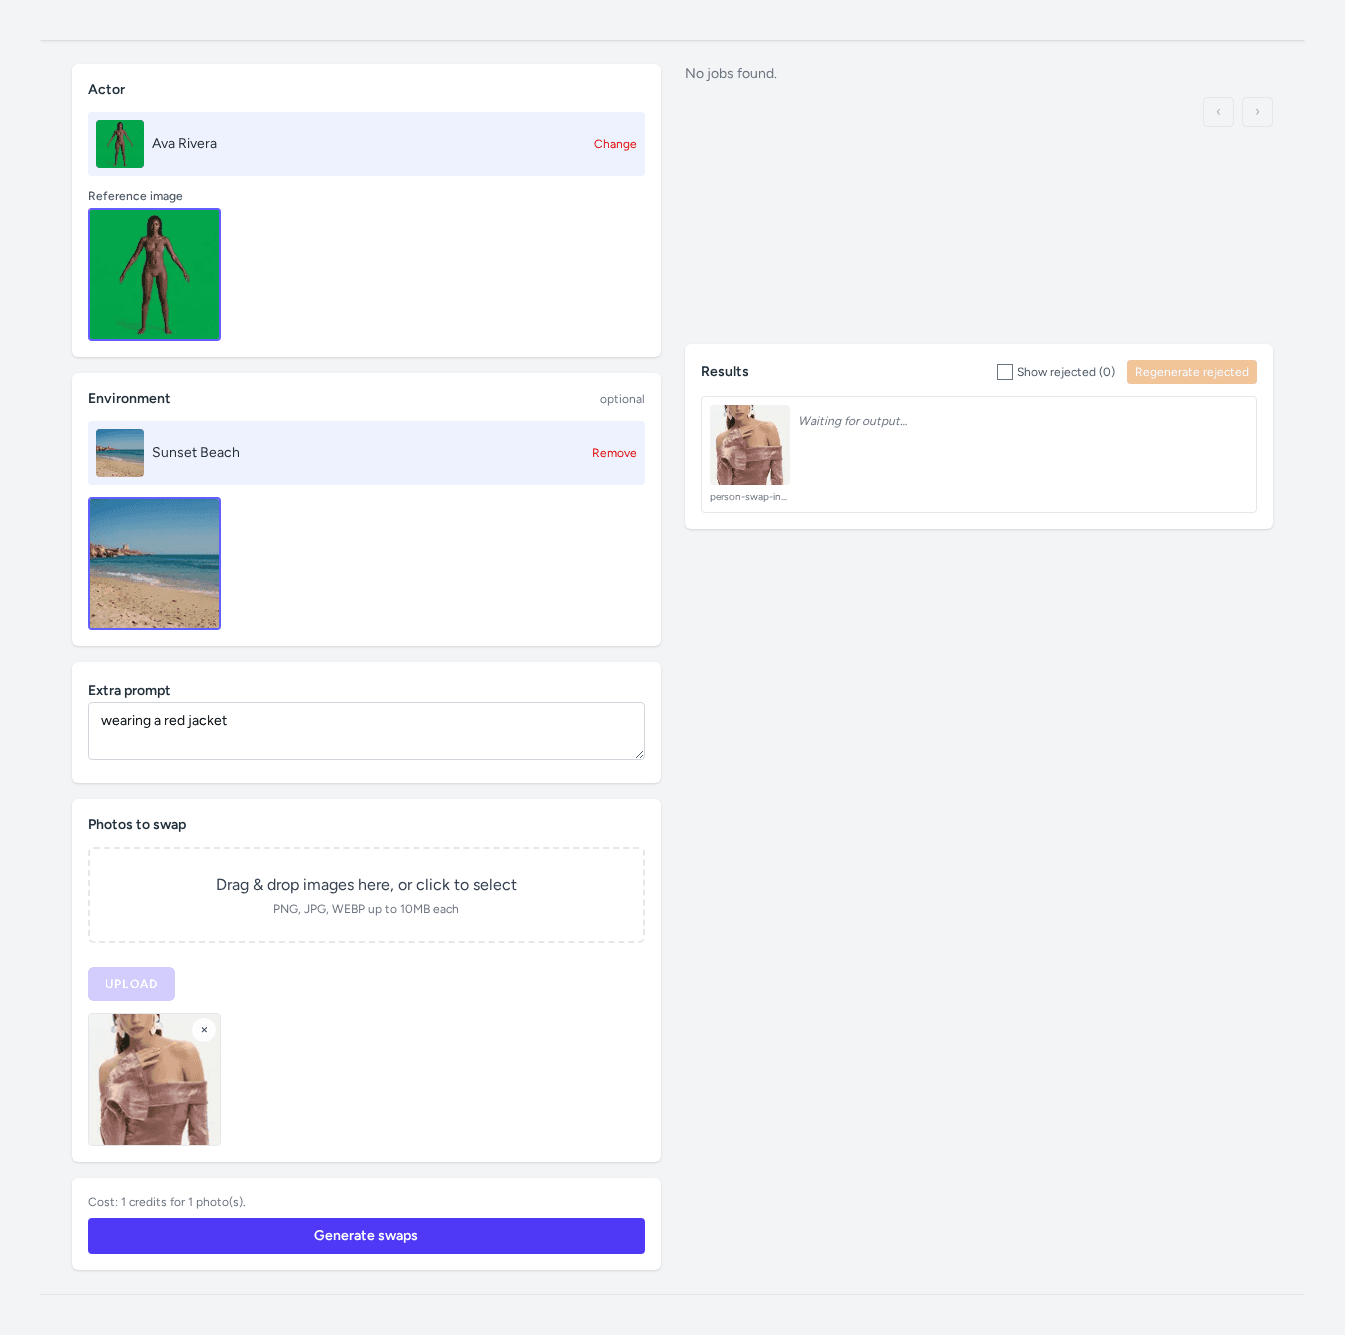
When the result appears in the dropdown, click it to select that actor. Vision loads a set of reference images (assets) for the selected actor — the first one is selected automatically. You can click a different thumbnail if you want to use a specific reference shot.
Tip: Actors are the reference models your team has added to Vision. If the person you’re looking for doesn’t appear in the search results, ask a team admin to add them first.
3. Choose an environment (optional)
The Environment picker works the same way as the actor picker. Type a scene name into the environment search box, then click the result that appears.
Once selected, Vision displays the environment’s reference assets below the search box. An environment tells Vision what background setting to use for the swapped image — for example, a studio backdrop, an outdoor scene, or a branded location.
Tip: Skipping the environment is fine if you only want to change the model and keep the original background. The environment field is optional and the Generate button will enable without it once an actor and input image are in place.
4. Add an extra prompt (optional)
Use the Extra prompt field to describe any details you’d like Vision to incorporate — for example, wearing a red jacket or holding the product at waist height. Keep prompts short and descriptive; one or two phrases work best.
5. Upload your source image
In the Inputs panel, click the upload area and select your source photo from your computer, or drag and drop the file directly onto the panel. When the file is attached, click Upload to send it to Vision.
Vision processes the upload and displays a thumbnail of your source image in the inputs grid. You should see one thumbnail appear within a few seconds.
Tip: You don’t need to remove the background from your source image beforehand — Vision handles that automatically as part of the swap process.
6. Generate the swap
With the actor and source image in place, the Generate button becomes active. Click Generate to start the AI process.
Vision runs the swap and attaches the result to your project. A confirmation banner appears at the top of the page once the generation is complete.
7. Review your output
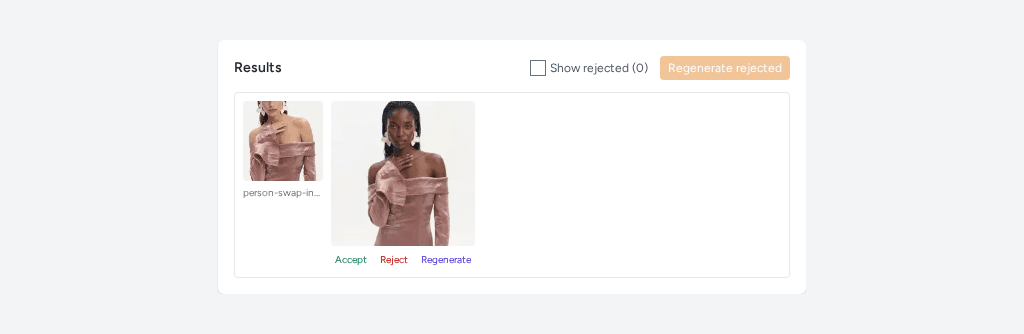
Scroll down to the Outputs panel. Your swapped image appears as a row with a preview thumbnail. Click the thumbnail to view the full result.
Tip: Each generation spends credits from your team’s balance. You can review what was charged in your Credit History.
Next steps
You’ve successfully swapped the person in a product image — your output is saved to the project and ready to download or use in your next campaign. From here you might run additional generations with different actors or environments to build out a full set of variations, or explore the Background Removal feature to cut out any image precisely before compositing it elsewhere.
All brand names are property of their respective owners and used for demonstration purposes only.