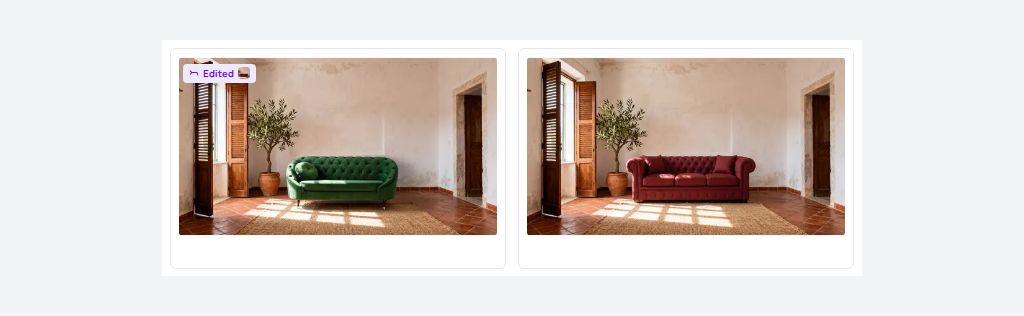
Already have an image you’re happy with, apart from one detail? Edit Mode lets you fix just that detail — mark the area, describe the change in plain words, and Vision generates a new version while keeping everything else intact. After this guide, you’ll know how to open a delivered image, switch into Edit Mode, mark what to change, describe the edit, and find the result in your project’s grid.
This is the right tool when you like an image overall and want a targeted fix — swapping a prop, changing a color, adjusting a background detail — rather than generating a brand-new image from scratch.
Before you start
- A project with at least one delivered image already in its grid (Edit Mode works on images Vision has already generated).
- A clear, specific description of the change you want — the more precise the wording, the better the result.
- Enough credits in your balance to cover the edit; cost depends on the resolution you choose.
1. Open your project
From the Vision Dashboard, click Projects in the top navigation. Find the project that holds the image you want to edit and click Edit on its row to open the project editor.
2. Open the image full size
In the project editor, hover over the image’s thumbnail in the asset grid and click the full size button that appears over it. This opens the image in a full-size viewer, with options to download or edit it.
3. Switch to Edit Mode
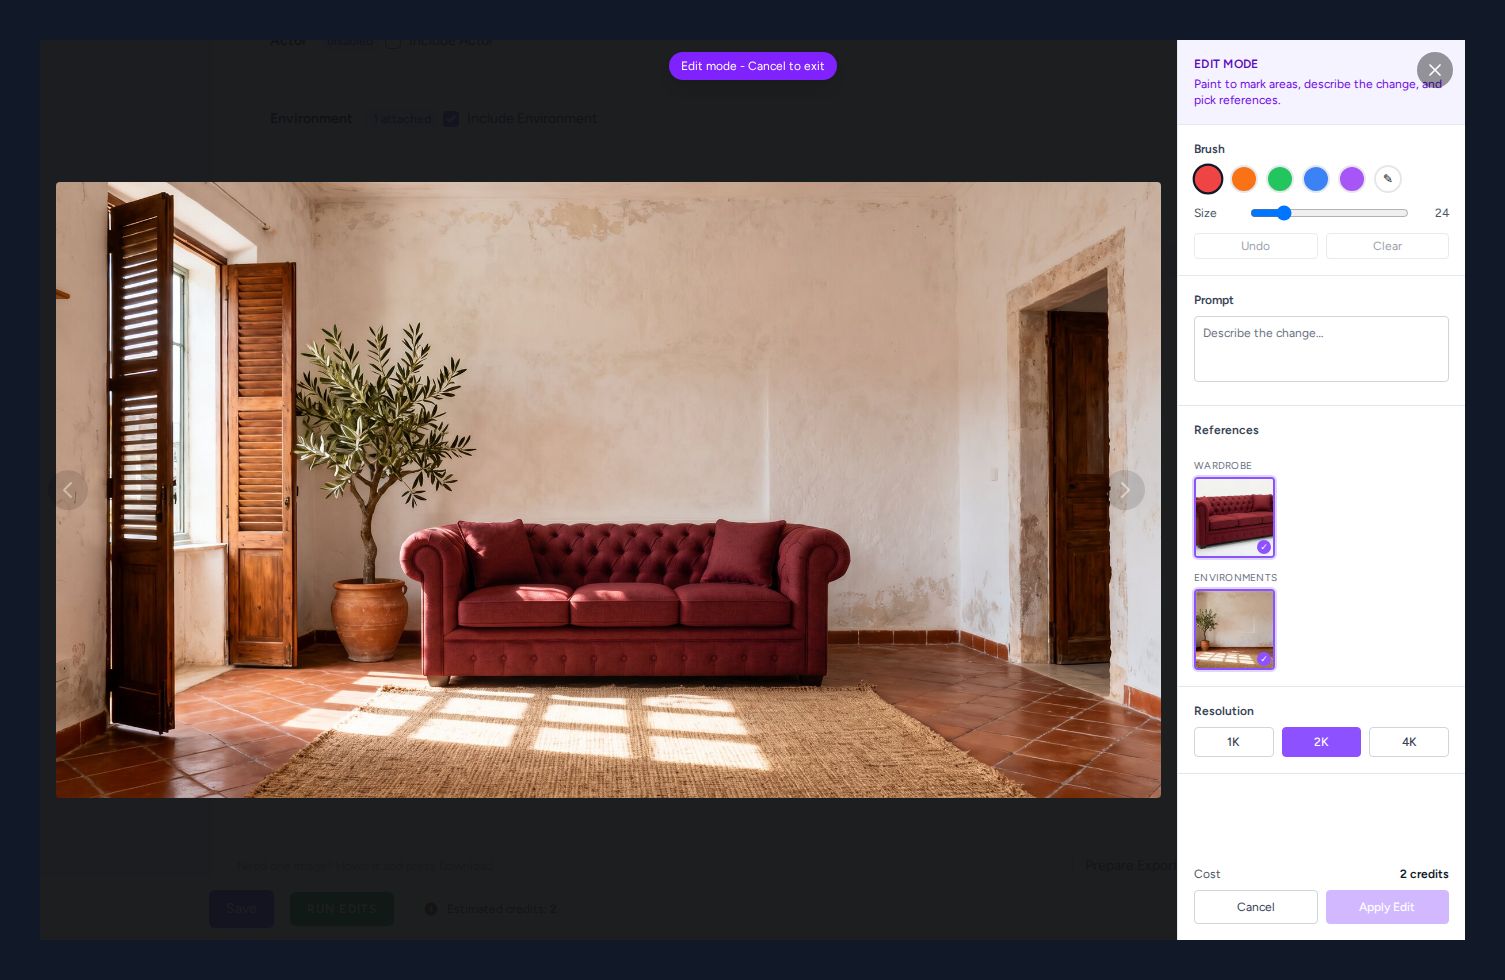
Click Edit in the viewer. The view switches into Edit Mode — a banner reading “Edit mode - Cancel to exit” confirms you’re in it, and the zoom controls disappear since you’re now marking the image instead of inspecting it.
Tip: You can leave Edit Mode at any time without making changes — just click Cancel on the banner.
4. Check the references and resolution
Edit Mode automatically carries over the references the image was originally generated with — you’ll see them listed and already selected, so the edit stays consistent with the actor, environment, or product the image is built from.
Below the references, the Cost line shows how many credits the edit will spend. A standard-width source image defaults to 2K, shown at a lower credit cost. If you need more detail, click 4K — the cost updates immediately — and you can switch back to 2K just as easily.
Tip: Only switch to 4K if you actually need the extra resolution; it costs more credits than 2K for the same edit.
5. Mark the area you want to change
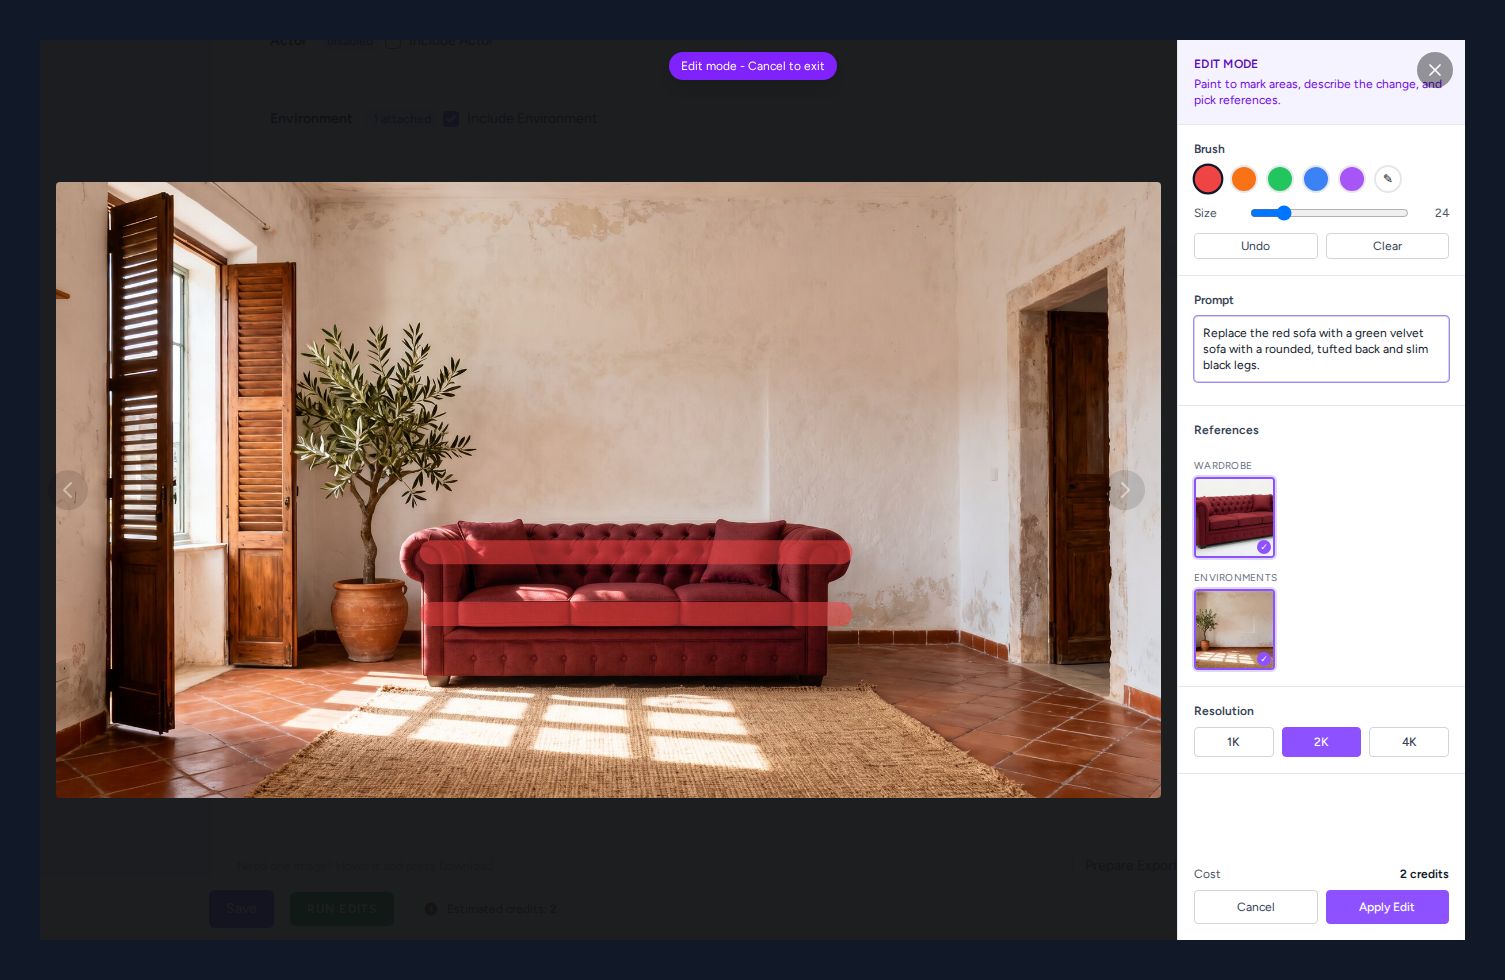
Drag directly over the part of the image you want to change to paint a mark over it. You can mark more than one area, and an Undo button lets you remove the last stroke if you mark the wrong spot.
Tip: Marks are a guide, not a requirement on their own — they tell Vision where to focus, but Apply Edit only turns on once you’ve also described what to change.
6. Describe the change
In the prompt field, write what you want the marked area to become — be as specific as you can about color, shape, and material. For example: “Replace the red sofa with a green velvet sofa with a rounded, tufted back and slim black legs.” Once you’ve typed a description, Apply Edit becomes enabled.
7. Apply the edit
Click Apply Edit. Vision confirms with “Edit job scheduled.” and closes the edit panel — your edit is now queued for generation.
8. Find the new image in the grid
Close the viewer to return to the project editor. Your original image is still there, and a new image joins the grid alongside it, marked with an Edited badge so you can always tell which images are derived edits and which are originals.
Tip: The original image is never overwritten — an edit always creates a new, separate image, so you can compare both or keep the original if the edit doesn’t work out.
Next steps
You’ve turned a delivered image into a refined, derived version without regenerating it from scratch. From here, check out the guide on Project Assets Review to see how to manage, compare, and organize all the images — originals and edits alike — in your project’s grid.