Vision’s background removal tool strips the background from any product or apparel image in seconds. Upload your source image, choose how aggressively you want the edges refined, and Vision returns a clean cutout — ready for compositing, catalogue pages, or further editing.
After this guide, you’ll know how to remove a background from an image in Vision, including how to tune the removal strength to suit your artwork.
Before you start
- You have a Vision account and your team is set up. If not, complete Team Onboarding first.
- You have at least one image uploaded to your team’s assets. Supported formats are standard web images (JPEG, PNG, WebP).
- You have enough credits in your balance to run the removal. Check your balance on the Vision Dashboard, or top up via Credit Topup.
1. Open the Background Removal tool
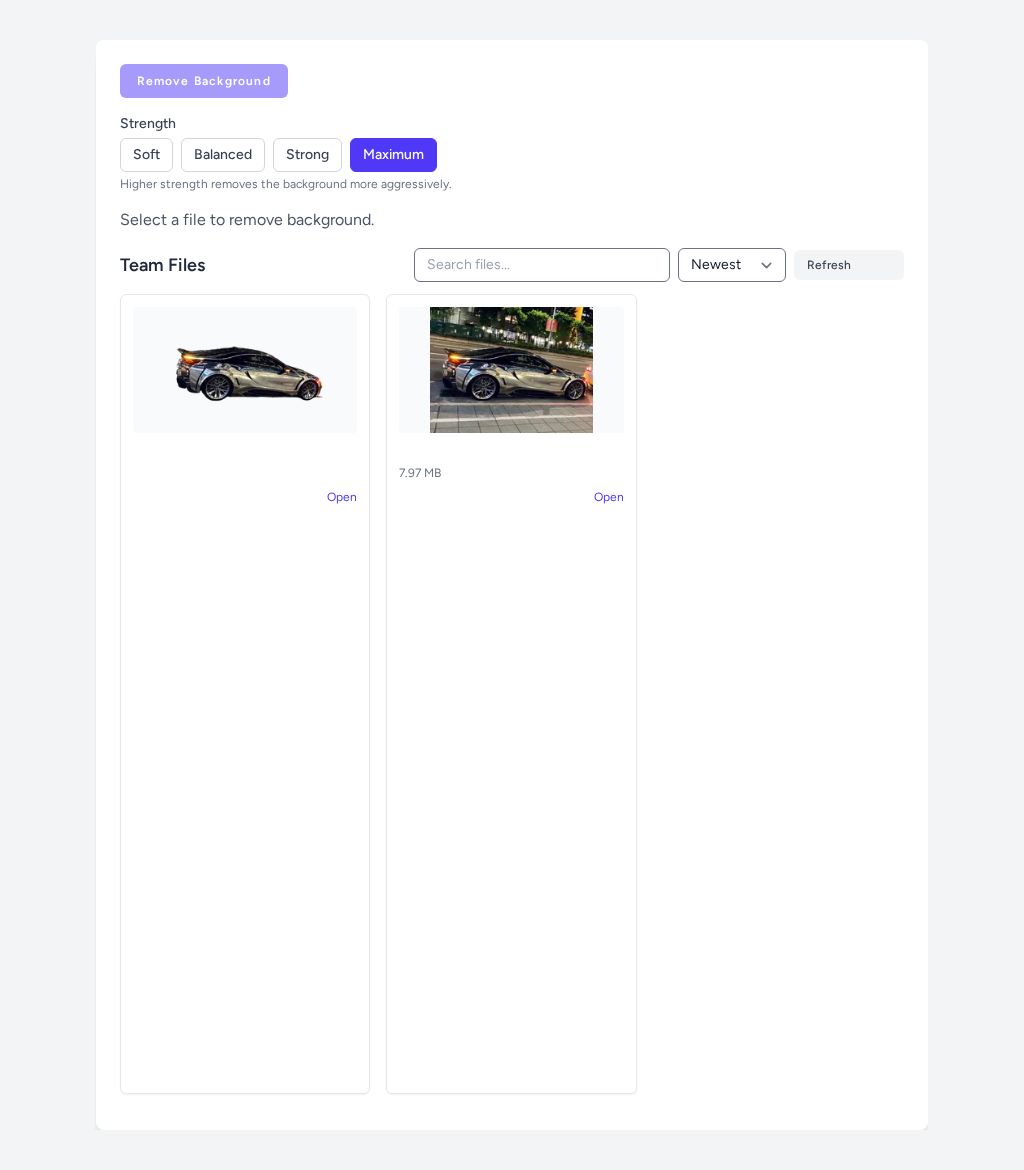
From the Vision Dashboard, navigate to the Background Removal section. The page loads with a strength selector on the left and your team’s image library below it.
Tip: You don’t need to pre-process or crop your image before arriving here — Vision handles the cutout directly from your original upload.
2. Choose a removal strength
Before picking an image, decide how you want Vision to treat the edges of your subject. The Strength selector offers three options:
- Soft — gentle edge treatment, good for hair, fur, or subjects with feathered edges.
- Default — a balanced cut suitable for most apparel and product photography.
- Max — the most aggressive removal, ideal for clean-edged products on plain backgrounds.
Max is pre-selected when you land on the page (highlighted in indigo).

Click whichever strength best matches your image. The selected option highlights in indigo to confirm your choice.

Tip: If the first result leaves a colour fringe or loses fine detail around the edges, re-run with a different strength — each run produces an independent output and your original is never modified.
3. Select a source image
Scroll down to your team’s file library. Each uploaded image appears as a card. Click the card for the image whose background you want to remove.
Once selected, the image name appears in the Selected file area above the library, and the Remove Background button activates.
Tip: If you don’t see the image you need, upload it to your team’s assets first, then return to this page — the library refreshes automatically.
4. Run the removal
Click Remove Background. Vision queues the job and processes it immediately. While it runs, the button returns to a disabled state so you won’t accidentally submit twice.
When the job completes, the Selected file indicator clears and the button disables again — that reset is your confirmation that the removal finished successfully. A brief success notification appears at the top of the page.
5. View and download your result
The file library refreshes automatically after the job finishes. You’ll now see two cards: your original source image and the new background-removed output, which appears at the top of the list.
Click Open on the result card to view or download the finished file. Your original image remains in the library alongside it for reference.
Tip: Background-removed outputs work great as the starting point for a Person Swap — you can drop your cutout subject into an entirely new scene without needing to repeat the removal step.
Next steps
You’ve successfully removed an image background using Vision’s AI tool. Your cutout is now saved to your team’s assets and ready to use in any downstream workflow.
From here you might:
- Composite the cutout into a new scene with Person Swap.
- Review how many credits the job consumed in Credit History.
- Top up your balance before your next batch run via Credit Topup.
All brand names are property of their respective owners and used for demonstration purposes only.